Tuesday, August 4, 2015

Offshore Kayak Fishing Packing List

Photo Credit @SAHunter_Outdoors
Any time you go fishing, especially from a kayak, your gear has to be wired tight. As I just learned, this is even more the case with beyond the breakers fishing. As I prepare for my second trip out I am getting a list of everything together that I will need based on what I took out on my first trip, and what I was missing from my first trip. The list looks something like this:

PFD
A buddy
Paddle
Big game rod and reel
Bait rod and reel
Rod holders
Tackle
Bait
Gaff
Billy club
Pliers
Knife
Dry bag
Two way radio
Camera
Fish bag
Measuring board
Sun protection
Drinking water & snacks
Leashes

PFD
This is at the top of every kayak packing list that I create, and for good reason. Always have your PFD on, ESPECIALLY if you are going offshore. I use a high back fishing PFD with pockets for extra storage.

A Buddy
It is always smart to bring a buddy along when you are doing any dangerous activity. I think of offshore fishing kind of like I think about SCUBA diving. In both cases you should always have a buddy that can help you out if something goes wrong.

A Paddle
This may seem like a silly one but with so many pedal driven boats out there it is still important to remember a paddle. If you have a drive malfunction you will need it. You may also need it getting through the surf zone.


Rod and Reel
For my game fish, I started with a relatively economical but very durable combo; a Penn 209 reel on an Ugly Stik Tiger Medium Heavy 30-60 lb line class rod spooled up with about 600 yards of 30 lb braid.  On top of that I put 15-30 yards of 30 lb mono using a FG knot, with my leaders tied directly to the mono topshot. This combo should handle most of what the Texas waters will throw at it.

On occassion you may need to catch some live bait on the rigs. You can use any rod and reel for this;  I bring one of my inshore spinning combos on light flurocarbon.
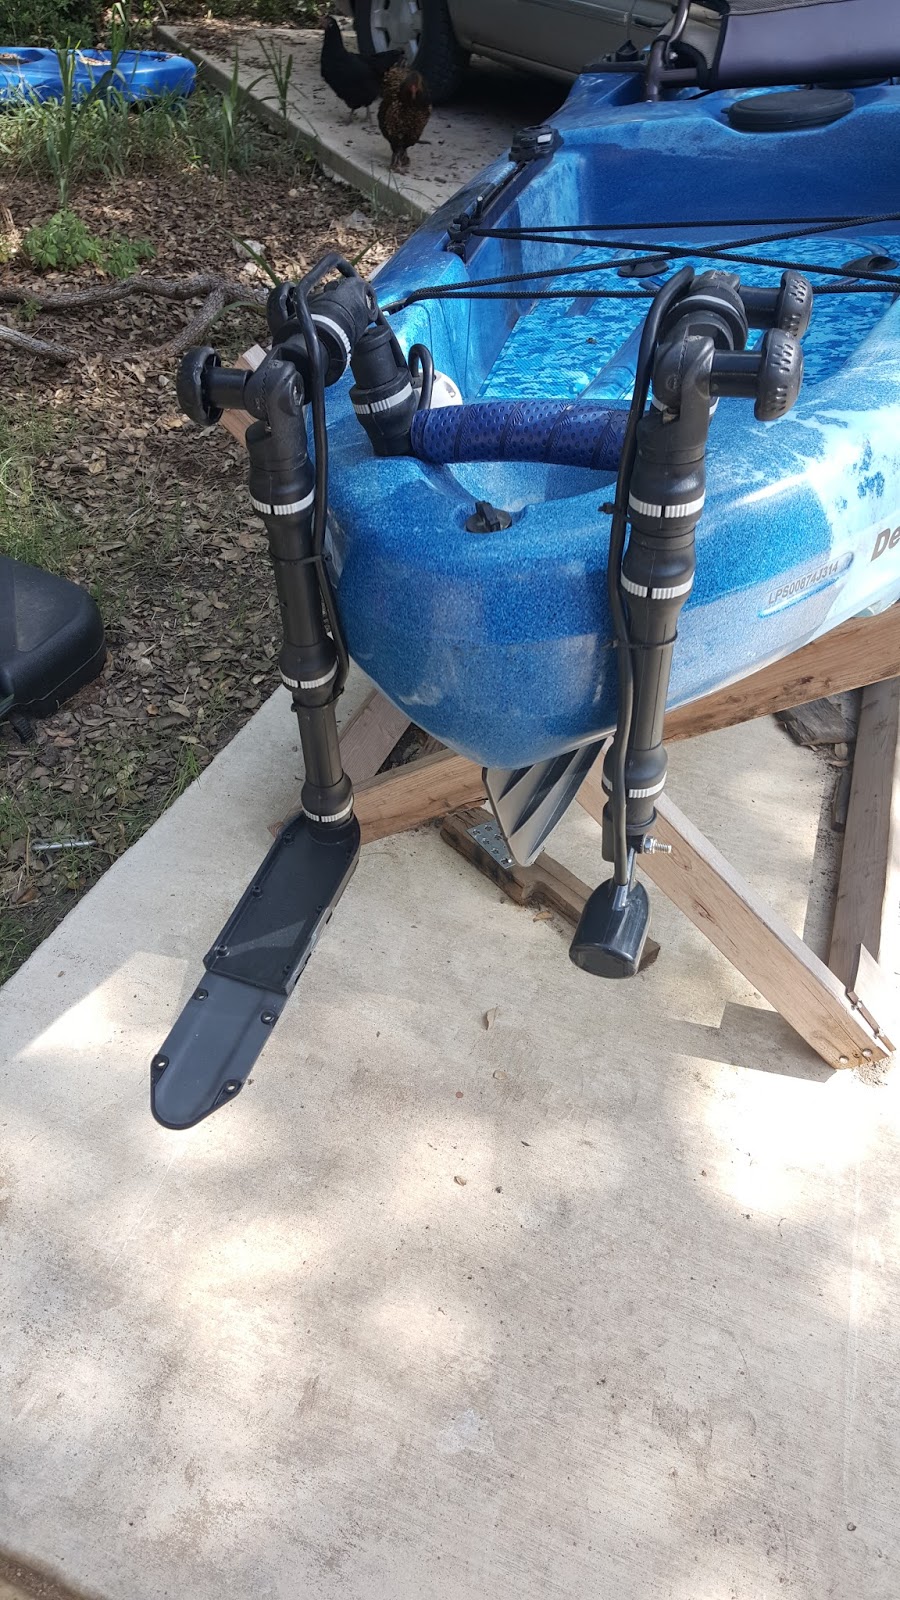
Rod Holders
There are a ton of different rod holders out there. I prefer the Railblaza Rod Holder as it is adjustable and durable.You will want a rod holder that allows you to secure your rods through the surf and then deploy them for trolling baits.


Tackle
Most of my tackle consists of pre-rigged wire leaders. You can buy kingfish leaders from the store, but I have had made most of the ones I will be using on my next trip. I am not going to get into the intracacies of hand made leaders right now but there are links to some excellent videos at the bottom of this post from Glenn Madden (Professor Salt) and Tod Johnson (@SAHunter_Outdoors). I also have a couple of crankbaits in case I run out of bait and can't catch any live bait. Keep in mind you'll likely need leaders for the crankbaits too. I also have some sabiki rigs to catch baitfish on my bait rod. Typically you'll need some small weights (3/8 to 1/2 oz) to drop these down around the rig pilings.

Bait
In my limited experience, we used ribbonfish. These are bought dead and by the dozen. In my first trip out I bought a dozen and lost them when my kayak rolled in the surf. Luckily for me, my fishing partner did not roll and therefore had a few to give me. I think in the case of our trip a dozen would have been plenty. For my next trip I will find a way to secure these so that they are not lost in the event that I roll my kayak.

Gaff and Billy Club
I put these together as they are typically used at the same time. When landing a fish that you intend to keep you need to gaff it quickly when it is next to the boat, and if it is a large fish you can use the club to give it several good whacks over the head. It is actually pretty brutal, but it prevents the fish from flopping around in the kayak and sinking one of the many hooks on your rig into your body.

Pliers
If you have fished before, this one is probably pretty obvious. In the salt most of the fish have got some chompers on them and you probably dont want to stick your fingers in or around their mouth. If your pliers have cutters on them that would be helpful in the event you need to cut any wire. Alternatively you can get some seperate wire cutters to do that job as well.

Knife
A knife is good to have for a number of things. Maybe you need to cut bait, or maybe when you flip you get a line tangled around you, a knife could be helpful in cutting you free. I keep one zip tied to my life vest for quick access.

Dry Bags
In my case I will likely just take one dry bag. In it I will store things like pliers, camera, hat, glasses, repair kit, etc., basically anything that is small that I can't or won't lash down.

Two Way Radio
Preferably one that floats and is waterproof. This is good if you need to call for help but also good for communicating with your buddies that are also on the water. Remember to know what channel is the emergency channel (Coast Guard) and what channel you can use for general chatter.

Camera
Whether it is an action cam or a point and click, having something to take pictures of your fish is always good to have.

Fish Bag
If you intend to keep any fish, a fishbag with ice is needed.  Keep in mind you are fishing offshore and the fish can be very large so a larger fish bag filled with ice is preferable.


Measuring Board
Whether you are measuring fish for a competition or just seeing if your catch is legal* to keep you will need a measuring board long enough to measure at least the minimum legal length of your catch.
*It is also a good idea to know your species of fish before you can go out. Know how to identify each species and what the legal sizes and bag limits for these species are.

Sun Protection
I prefer to cover up as much skin as possible as opposed to using a ton of sun screen. As such, I use a hat, sunglasses, a buff, long sleeve shirt, and pants. I do use sunscreen on exposed areas but I try to keep those areas as limited as possible. On my first trip out I lost my hat and sunglasses when rolling in the surf. Moving forward I will remove these and put them in a dry storage bag until I am past the surf zone.

Drinking Water
It is easy to get dehydrated, especially when dealing with sun and salt and the excitement of landing monster fish. Bring a small cooler and a few bottles of water. Maybe a snack as well. Typically I will bring a lunchable to eat in a pinch.

Leashes
On my next trip I intend to lash everything down that I can. Even if it floats I will lash it down so that I don't have to chase it down in the event of a flip. There are plenty of off-the-shelf leashes that work, but leashes can be made pretty easily as well. I will be leashing down my rods, propel drive, dry bags, gaff, club, measuring board, etc, and what I don't leash will likely be stored in a bag that is leashed.


By no means is this a complete list of everything you can bring out. I am not a seasoned offshore angler but these are the things that I saw need and use for after my first trip out. Also keep in mind it may be a good idea to have backups of some of the smaller items like pliers that have a way of going overboard from time to time.


Videos on tying kingfish leaders:
Glenn Madden's kingfish leader tutorial https://www.youtube.com/watch?v=3t82a8-iUXg
Tod Johnson tieing NiTi Leaders https://www.youtube.com/watch?v=oPkti2AwMxU

Sunday, July 19, 2015

The King and I


Passing the first rig on the way back in.
Photo credit to Tod Johnson @SAHunter_Outdoors
I took my first offshore trip in a kayak last weekend.  It is something I have been really itching to do since I went on my Great White dive last summer.  Fitting that almost a month short of the one year anniversary of that trip I was finally able to get back out to the blue water.  This time in my weapon of choice, a kayak.  I posted a story on my experience on my facebook page last weekend that can be found below but as I thought about it more I began to assess all of the things I could have done differently to prevent the bad things that happened on the trip. Let me start off by saying I am in no way an expert at blue water kayak fishing.  What I am is a novice who just learned several valuable lessons that are fresh in my mind and those lessons might be helpful to those of you who want to give blue water kayak fishing a try.  

  1. Don't take anything out you are afraid to lose.  Especially your first trip out.
  2. If at all possible spend some time playing in the surf with your boat unrigged before you go out rigged.  
  3. Ensure you are able to flip your boat upright and renenter the boat in water above your head.  This can be a challenge when waves are hitting you.
  4. Make sure everything is lashed down.  Even if it floats lash it down
  5. Stow your hat and sunglasses while you go through the surf and put them on after.  Better to not have them on initially than to lose them and not have them on all day.
  6. Don't have anything rigged up on your rods when you go out.  If you flip with a rigged rod you run the risk of getting hooked.
  7. Once you have made it through the surf successfully check everything on your boat to make sure that it wasn't broken or lost.
  8. Once past the surf zone watch out for rogue waves.  If you aren't paying attention a big roller could knock you out of the boat.  
  9. On the way back in if you doubt your reentry skills just jump out, grab the front of the boat and hang on.  
  10. Go with someone who is profficient in blue water fishing from a kayak if at all possible.  It also helps if this person is patient.
  11. Last but not least, wear pants that will stay buttoned up when you get rolled in the surf :)
This is by no means a complete list of things I took away from my first trip.  Beyond the Breakers (BTB) kayaking is such a different beast than flat water kayaking.  While safety should always be your primary concern regardless of the type of water you are on, everything is magnified when you go BTB. Mistakes are easier to make and the consequences of those mistakes are usually more immediately threatening.  Always wear your PFD and always go with a buddy.

Safely back on shore with my first King
Photo credit to Tod Johnson @SAHunter_Outdoors

All in all my trip was awesome and I have been thinking of little else other than my next trip to the blue.  Check out my story below if you haven't read it already.  As I rethink my strategy for rigging and prepping for my next BTB trip I will post a follow up to this so keep an eye out.  See my account from the trip below.

Story time kids. As you might have seen or heard I had my first offshore adventure in a kayak yesterday. I hooked up with Tod Johnson and Glenn Madden among many others Saturday AM at sun up. We got all rigged up and set off through the surf. I attempted to paddle out initially because I feared my Propel drive would bottom out in the surf. In the breakers a wave hit me and tipped the yak in about chest deep water. I tipped the yak back over and got back in just in time for another wave to tip me again. At that point I lost my sunglasses, bait, hat, and one shoe, and my propel drive was just barely hanging from the boat. I decided it was best to go back in and re-rig the boat and collect myself. After lashing my drive a little better I went back out and contemplated what to do. After looking at the waves for several minutes I began to feel defeated. I took the boat back in and was about to leave when I had a short conversation with another angler on the shore about what to do. I decided to give it one more try. This time I walked out about waist deep, put my drive down, hopped in and blasted through all the breakers like a boss . grin emoticon Tod was waiting for me, luckily with bait. We began paddling towards the rigs which werr several miles out from shore. Once we started to get into clean water we hooked up ribbon fish as bait and began trolling. Just before we got to the first rig my reel started to scream. I grabbed the rod and engaged it causing it to immediately bow with the strength of the fish. I fought the fish for a few seconds and thought he got off. It turns out he was just running sideways and I couldn't feel him. When I finally felt him again he threw the hooks. Feeling encouraged and adrenaline fueled I threw another bait out and started trolling. After passing the first rig I hooked up again and the fish started ripping drag. Then the line sunk into the spool and the fish immediately popped the 30 lb mono topshot. Now I was starting to feel a little frustrated. As we reached the second in a line of 4 oil rigs I decided to try and catch some bait. Using a smaller rod I was jigging on the oil rig using my propel drive to hold the kayak just a few feet off of the rig in 2-4 foot swells. I picked up what I believe was several small snapper but nothing I could use for bait. I decided to keep trolling. Between the third and forth rig I hooked up again and was almost immediately broke off. This was also about the time one of the other guys hooked up a spinner shark that went airborne with acrobatic aerial spin before spitting the hook. That was pretty awesome to see. I trolled back and forth between the farthest three rigs eventually hooking up with a kingfish. I fought him for several minutes before he eventually ran into my Propel drive. I gave him a little slack and was eventually able to pull him free and land him. I finally had my first keeper offshore fish from a yak. Later on I trolled up a Spanish Mackrel and pulled a couple of triggerfish off of the rigs. At some point my GoPro came off the kayak and fell into the water, I believe due to damage suffered during my rolls in the surf. At this point Tod and I headed back in. Reentry to the surf is generally the toughest part of any offshore trip and it certainly was for me. I rolled almost immediately in water too deep to stand and during this process my pants ended up around my knees and I had to figure out which problem to fix first. smile emoticon I pulled up my pants, climbed on top of my yak and flipped it back over. Miraculously I lost nothing this time except a little pride. I opted to stay in the water and hang onto the front of the yak all the way in to the beach. Tod and I took pictures, loaded up yaks, and got a quick kingfish cleaning session from Professor Salt himself. I was emotionally and physically worn out. It seems like a lot of bad things happened on this trip but that isn't the way I see it. I overcame the initial defeat that was thrown at me to get out and fish the blue from a yak. I learned very valuable lessons I can use for next time, and trust me....there will be a next time. Thanks to my Railblaza team member Tod and to Glenn Madden AKA Professor Salt for helping me through this adventure.

Wednesday, March 25, 2015

Feel the Flow Happy! Feel it! It's Circular!


A lot of new anglers and seasoned anglers alike get caught up in the what bait, what color pitfall. While these things are often important, I think they are often less important than we anglers make them out to be. I have found that if I am confident in a bait I will usually catch fish with it. Bait confidence is really easy and it is something I often talk to new anglers about when doing seminars. Instead of going out and buying every lure on the shelf at your local retailer, pick a couple of baits that mimic different patterns (usually a shad pattern and a creature pattern in my case) and build confidence in those baits. If you have done any fishing at all you may already have a couple that you like. I know I have a few baits that I can catch fish on almost every time I go out. I know this and that confidence is what I believe helps produce those bites. Not only that but when I start catching those fish on confidence baits then I can switch over to something new or different that I don't typically have as much confidence in, and I can begin to gain confidence in those baits because I am confident the fish are there and I will catch them.

I have also found that if my mental game isn't right that it doesn't take much for me to have a bad day of fishing. Most of us have had that day of fishing where nothing seems to go right. Whether a piece of equipment breaks, or you lose a big fish, or you get a hook in the hand, it can be hard to recover from that and have a good trip if you don't have your mind right. On the other hand, if you have a positive mental attitude and go out knowing that you are going to catch fish and have a good time then you usually don't have those types of issues, and even if you do you are able to move past them much easier. That positive mental attitude also applies to every other part of your life. It is amazing the difference in a day where you have a positive outlook vs a day when you are feeling like a grumpy pants.

Tuesday, March 17, 2015

HDS9 Gen2 Touch Install with Railblaza


Kayak anglers are riding the waves of progress by fishing bigger water and pushing the limits of what our yaks can do.  We are kitting out our rigs and using more advanced techniques every day.  It is not uncommon to see kayaks using the types of electronics that we thought we would only ever see on powerboats.  While kayak and accessory manufacturers are making huge strides toward the easy integration of electronics on yaks, the successful installation of these tools still requires a feat of ingenuity by the angler themselves.  While the number of anglers installing these devices is growing, there are still only a few examples of prior work to use for guidance.  Lucky for me I happen to know several very proficient kayak anglers who have installed Lowrance Structure Scan compatible fish finders on their kayaks so I knew some of the headaches they had to work through, but I only found one example of someone in a Slayer Propel with a similar device. I knew that as I prepared to install I would have to start with some fairly intensive planning, so I took what I could find and began formulating a plan that I liked.  My main concerns were:

  • Head unit placement/mounting hardware
  • Transducer placement/mounting hardware
  • Lowrance GPS Point1 Antenna Location
  • Battery Placement and Specifications
  • Deck Fittings for thru hull wiring
  • Wiring Schematics/integration with lighting

While companies like Railblaza have come up with some elegant solutions to many of the challenges that electronics installation on a kayak present, there were still certain areas that required some creative engineering.


Parts List
1 - Native Watercraft Slayer Propel 13
1 - Lowrance HDS Gen2 Touch Structure Scan Bundle
1 - Lowrance Point1 GPS Antenna
1 - Lowrance NMEA 2000 Networking Kit 
1 - Thru hull wire cap
1 - 30+ Amp Hour 12 Volt Battery
2 - Two Wire quick disconnects (You can get just one and cit it in half but it doesn't leave much wire to play with)

Head Unit Mount
2 - Railblaza adjustable extender w/o miniports
1 - Stick of 2-inch aluminum
1 - Starport HD TracMount Kit
1 - Scanstrut DS40P
3 - Feet of 25mm woven cable sleeving, or fishing rod sleeve
1 - Heat Shrink large enough to fit over all wires at head unit and cable sleeving.

Transducer Mounts
2 - Raillaza Kayak Transducer Mount
2 - Railblaza Miniport Tracmount
2 - Railblaza Adjustable Extenders
1 - Railblaza Extender
1 - LSS Transdcuer Bracket
1 - Railblaza Adaptor
1 - Scanstrut DS30P
1 - Heat Shrink (Large enough to fit over rear carry handle and two transducer wires)
1 - Lizard Skin Tape


Planning

There were certain aspects of this particular install that I hadn't really seen in practice, so I knew planning was going to be key.  I spent days trying to find the right way to do things.  I had removed my old fishfinder, so some holes were already drilled in the boat.  The hole at the head unit would need to be widened.  I would need to find a stronger mounting solution for the larger head unit.  The HDS series of fish finders uses additional wires so the through hull fitting I had for my old unit wouldn't work.  The old fish finder had one transducer that I scupper mounted.  The new one had two transducers that needed to be mounted within 12 inches of each other; I didn't want to scupper mount them because they were so large, and because I didn't want to introduce any possible sources of interference to the side-scan signal, so relocating the transducers was in order.  That also meant two transducer wires, each larger than my previous install, so I had to upgrade the size of that through hull fitting as well.  I was adding the Point1 GPS antenna, which would tell my fish finder's GPS which way the boat was pointing, so I had to identify a mounting location for that as close to the transducers as possible.  My old battery wasn't going to put out enough power, so a new, higher powered battery was needed.  Finally, I had to rethink all of the internal wiring in the hull of the boat.  Luckily for me I had some great kayak anglers, DIY engineers, and friends on the Railblaza staff that were of immense help throughout the process.  I was able to bounce ideas off of everyone, and then go online to places like Railblaza.com to find products that met the challenges of the install.  Most of the parts were pretty readily available online or in local stores, with the exception of the Scanstrut fittings (I had to purchase those from ebay).  At the end of the day I was confident that most of what I was doing would work great, but I knew that certain things were going to require some on-the-water testing once I completed the install; for example, the transducer placement on the stern of the boat.


Installation
The head unit with Railblaza
Adjustable Extenders andScanstrut
DS40P in place with cable sleeve 
installation.

Head Unit
I made a custom aluminum bracket to bolt to the bottom of the HDS9 mounting bracket because the stock  HDS9 bracket had a hole cutout in the center and I wanted to mount a Railblaza adjustable extender to the HDS9 bracket directly.  I mounted a Railblaza Starport HD with Trac Kit to the stock Native rails.  From there I removed the miniports from two Railblaza Adjustable Extenders and bolted them directly together.  I did this to keep the mount more compact as I felt it would be stronger this way.  Recall that I had my previous Elite 5 DSI mounted here and as such had a 1-inch hole drilled out for the transducer/power wire.  This hole wasn't going to be big enough for the HDS9 wires so I opted to widen the hole to about an inch and 7/32 using a step drill bit.  Using a Scanstrut Large Deck Seal I drilled out one of the rubber inserts to fit my wires with a bit of room to spare.  The rubber was thick enough that using a step bit from both sides left a bit of a collar on the inside of the rubber plug.  I used a dremel to even everything out.  The bit of extra room around the wire is to allow for the woven cable sleeve to run through the hole as well.  This probably isn't totally waterproof, but given its location probably doesn't need to be and it still looks clean.

The Scanstrut deck seals don't require inside access to the hull so they are very easy to mount.  I used a piece of small steel cable as a wire fish to get the cables to and through the hole.  For a finishing touch I sleeved the cables and heat shrunk both ends of the sleeve.  A note on feeding wires: both transducer wires have to feed from the transducer locations to the head unit.  So in this case both wires had to feed inside the hull at the back of the boat and then inside the hull until they come out at the head unit. These wires were the first to be fed through because you had to feed them through the inside of the hull out, which can be difficult.  Then the power wire and NMEA 2000 wire can be fed from the head unit into the hull.


LSS and Sonar transducers mounted
using 2 Railbalza transducer arms.
Transducers
I thought mounting the transducers was was going to be one of the more difficult parts of the job.  However with a little bit of research I came up with a fantastic option.  I took two Railblaza MiniPort TracMounts and paired them with some inch and a half 1/4 20 screws and screwed them into existing holes for the rear carry handle.  To do this I had to remove the small plastic disk on the TracMount and dremel a small area out to allow for a good fit over the rear carry handle.  Form there I used two Railblaza adjustable StarPort Extenders to make a 90 degree turn and then connected Railblaza Transducer Mounts. The transducer mounts worked perfectly out of the box for the sonar transducer.  However for the LSS-2 transducer I needed to do some custom work.  You could easily make a bracket for the LSS-2 transducer with starboard or similar material that could integrate into the Railblaza system.  However I already had bracket that I was easily able to incorporate via a Railblaza adaptor.  I also added a Railblaza extender to the LSS transducer arm and an additional mini port to the Sonar arm to extend these arms to my desired depth. These arms are super heavy duty and adjustable while still maintaining a acceptable level of rigidity.  I zip-tied the transducer wires to the transducer arms and then ran them through some large diameter heat shrink before sending them into a Scanstrut DS30P fitting on the top deck.  I drilled the hole as big as I could while still being able to use the fitting.  In this case I only had two large wires so I used the medium deck seal fitting.  Again I modified the rubber plug, but to fit the two wires in this case instead of just the one like before.  This solution probably needs to be more waterproof, so I drilled to holes in the rubber plug the exact diameter of the wires.  I shrunk the heat shrink once everything was in place and wrapped the whole thing in Lizard Skin baseball bat tape to make for a comfortable non slip grip when carrying the boat.  It also looks very clean.


Point1 Antenna mounted behind the seat.

Point1 Antenna Install
This part was a breeze.  I picked a spot behind the seat that was nice and flat, and it was pretty close to the transducers.  My understanding is that the Point1 should be close to the transducers because the distance between the two is essentially how far off your waypoints will be when you mark them.

The install itself went very smoothly.   I drilled a ¾ inch hole for the wire, set the puck down on the hull with the wire in the hole and then made sure the arrow on top of the transducer was pointing forward and then marked the two screw holes.  I drilled those holes slightly smaller than the screws themselves to make for a more water tight seal, but the antenna does have a rubber gasket that fits underneath it so I doubt water will ever be an issue here.  The antenna only comes with a couple of screws and I wanted to secure them from the other side of the hull.  I used a couple of nuts with nylon inserts that I had laying around that happened to fit perfectly.  I backed the screws with those, and viola! Antenna complete.  The whole process took less than 10 minutes.


Here you can see the wiring harness that
Dez Davis from SuperNova Fishing Lights
 came up with.  There are 3 waterproof fuse 
boots, onefor the HDS9, one for the NMEA 
2000 backbone, and one for the SuperNova
 lights int he cockpit and on the bow.
Wiring and Battery
I opted not to do the in-hull wiring and battery on my own.  Why would I, with SuperNova's Dez Davis in my back yard?! I go to the mad scientist himself for some excellent wiring, and maybe some ideas that I hadn't thought of.  I got both.  I have seen some of his completed work, not just on my boat, and it doesn't get much cleaner.  I wanted the wiring for the SuperNova lights that I have installed in the cockpit and bow incorporated into the wiring for the fish finder, so I couldn't think of a better person to help with this.

We started by getting all of the wires to front hatch.  We ran the Point1 antenna wire to the front hatch by adding the short extension that came with the Point1.  We attached it to the NMEA backbone, and then attached the backbone to the inside of the hull using a button zip-tie that was screwed into one of the screws used to bolt the tracking in place on the Slayer Propel 13.  From there I attached the NMEA backbone to the fish finder with one of the NMEA extension wires.  I added the NMEA 2000 power wire to the backbone, and then Dez took over.  He wired all of the power together for the HDS 9, and the SuperNova lights.  He attached that to a single power wire that ran into the front tank well using a thru hull wire cap.  That cable was tipped with a quick disconnect fitting.  On the battery another quick disconnect fitting was used so that the battery could be easily connected and disconnected for transport and charging.  He also resealed the SuperNova lights on the bow to stop some leakage I was having from my DIY install previously, but that’s a topic for another post.  Once Dez worked his magic, all of the wiring looked very clean and professional, and more importantly than that – it worked.

Photo Walkthrough
Below is a photo walkthrough of the install.
The head unit with Scanstrut DS40P in place with cable sleeve 
installation.

Custom mounting bracket fabricated from 2-inch aluminum stock.

HDS 9 with connectors in place.
View of the Railblaza Adjustable Extender connected directly to the
custom aluminum mounting bracket.
View of the transducer arm miniports
 bolted into the rear handle of 
the
Native Watercraft Slayer.
Railblaza Transducer Arms in the deployed position
Railblaza Transducer Arms in the stowed position for travel

The location of the Point1 GPS antenna.  You can't see it here but
there is a small arrow on the top of the puck that points forward.
A small hole was drilled underneath the puck to allow the wire to pass
through the hull.  Without this antenna the HDS9's charts will base
the orientation of your boat off of movement which isn't always
accurate and can cause your charts to flip around which can be an
annoyance.


33 Amp Hour AGM battery.  You can see the quick disconnect harness
that Dez Davis of SuperNova lighting rigged up.
The NMEA 2000 start kit pictured here is used to network the
Lowrance Point1 Antenna to the HDS9 head unit.  The kit
consists of a couple of T connectors, a long and short NEMA
cable, some caps for the T connectors, and a fused power wire.
The Point1 antenna comes with an additional T all of which
need to be connected and wired together to get the Point1
signal from the antenna to the head unit and also to power the
NMEA 2000 backbone.
To secure the NMEA 2000 backbone to the boat so that it was not just laying on the bottom of the inside of the hull we used a
button zip tie that allows you to attach the zip tie to a screw.  In this case I removed the screw pictured above and replaced it
with a screw slightly longer so that I could place the zip tie on the underside of the hull.  I also added a washer to make the
screw tighten down a bit better.  Then I attached the NMEA 2000 backbone to the zip tie.
You can see here a screen capture from the HDS9 from underneath a bridge on a local fishery.

Tuesday, August 5, 2014

"You go inside the cage? Cage goes in the water? You go in the water? Shark's in the water?"

Warning there be non kayak fishing related posts ahead.


A week from today I embark on an adventure that I have dreamed about since I was a child and I saw the movie Jaws. When I saw that movie in fell in love with sharks and particularly the great white shark. Since that day it has been my dream to be in the water (and in a cage) with these animals. On Tuesday we embark for San Diego to live out that dream. Once there we will spend a couple days visiting family, going to the San Diego Zoo, and checking out the USS Midway museum. Then it is off to a little island off the west coast of Mexico called Isla Guadalupe. 


 We will be taking a Great White Adventures charter out of San Diego and going on a 5 day trip to the island. Guadalupe is the premier spot in the world to dive with these animals due to the up to 100 foot visibility and relatively warm water. For 3 of these days we will be diving with the oceans apex predator. Not only that but I get to fish for tuna on the days we aren't diving which should be almost equally awesome. I am taking 2 Go Pros so by the time it is all said and done I am hoping to have a wealth of footage. Stay tuned for what I hope is some amazing stuff.

Wednesday, July 23, 2014

Bending Branches Navigator vs Angler Pro


I recently picked up a Bending Branches Angler Pro paddle for my fleet of plastic boats. Anyone who has seen me at demos knows that I love my Bending Branches Navigator wooden paddle, but since picking the Angler Pro I thought I would do a little comparison between the two. These two paddles are by far the best paddles I have used but they are fairly different paddles. The Angler Pro is a part of the Angler series of Bending Branches paddles and as such has a couple features that are geared towards the angler while the Navigator paddle is more of a touring style paddle. However that doesn't mean the Navigator isn't an excellent fishing paddle.


The first thing most people notice when the see the Navigator is how beautiful it looks. Wood paddles are not typical amongst kayak fisherman. Most guys have some kind of plastic, carbon fiber, or fiberglass. These are all great materials and each has their benefits, but the wood paddles look good and perform even better. It is possible to scratch it up but there is a rock guard system on the bottom of each blade to protect the wood. Should you ever want to have the blade refinished you can send it back to Bending Branches, or even do it yourself with marine grade polyurethane if you are handy The first thing I noticed about my Navigator was how light weight it was. For comparison the Angler Pro comes in at 30 oz with fiberglass blades and a carbon fiber shaft. A very lightweight paddle by anyone's definition. However the navigator weighs 28 oz so it is even lighter. The other thing I have noticed is that the wood blade seems more buoyant. That combined with the sleek profile make it dead silent when the blade enters and exits the water. As I mentioned before it is more of a touring style blade so it isn't as tall. That means it is going to move through the water more easily giving the user less fatigue.


The Angler Pro on the other hand has a large powerful blade. With so many large kayaks coming into the market the larger blade is beneficial because it really pushes a lot of water and gets your kayak moving. It isn't as silent as the Navigator and while it is slightly heavier it is still super lightweight. It has a ruler built into the shaft to allow you to measure your catch. The blade is fiberglass and the shaft like the Navigator is carbon fiber. With the Angler Pro you can choose between a tan/olive colored blade, or a lime green/yellow blade. Both blades look fantastic.

At the end of the day what really determines which paddle I take is the kayak that I will be using. If I am using one of my big hulking yaks I will grab the Angler Pro. The extra water it pushes really makes paddling the heavier yaks a breeze. If I am taking one of my smaller yaks like my Slayer 12 I will grab my Navigator in a heart beat. You really can't go wrong with either paddle, but sometimes it is good to get some insight on how others are using them.

Thursday, June 26, 2014

Handling Bass for Catch, Photo, and Release (CPR)


One of my favorite things about the kayak angling community is the propensity for catch and release amongst its members. Catch and release is a great practice for anglers to maintain fish populations and encourage the growth of large bass. While there are scenarios in which culling fish from a water body is beneficial, the increasing pressures from the overall popularity of the sport combined with our shrinking bodies of water, especially in Texas, catch and release is more crucial than ever before.


Unlike bass boats, kayaks have no built in live wells to conveniently hold and/or transport fish for the angler to release at a later time. As such, kayak anglers typically perform catch, photo, and release (CPR) to document their catch. While catching a fish, taking a picture, and subsequently releasing the fish seems straightforward enough, your handling of the fish has a direct impact on the survival rate of the fish after you release it.

Removing the hook is often where the most damage is done to the fish. For obvious reasons pulling sharp pointy objects with barbs imbedded in a fish's mouth has some inherent dangers. You can limit some of this danger before you ever land the fish. One way to do this is to do your best to ensure the fish isn't swallowing the bait before you set the hook. If the fish swallows the bait and you crank him out of the water by a hook that is through his stomach lining or throat you are going to do some damage. Often times, especially when fishing with large plastics, you want to make sure that the fish has the bait and hook in its mouth before you set the hook. With practice you will learn how long is too long. Once you have landed the fish, removing the hooks can be anywhere from very easy to very difficult. When I am using baits equipped with treble hooks I tend to net the fish to avoid harm to both myself and the fish. I don't want my hand anywhere near a fishes mouth when that fish gets to shaking its head with a big ole crankbait in there. If you are unfortunate enough to get hooked while the bait is still in the fish's mouth that all but guarantees that fish will be out of the water longer than necessary, or healthy. More often than not when the fish has eaten a treble hook bait it doesn't swallow the hooks, like it can on a soft plastic, and the hooks are usually easy enough to get out with a pair of good pliers. When using a worm hook I can usually pop the hook out of the fish's mouth easily using pliers, unless the fish has swallowed the hook. If the fish does swallow the hook then usually what you see when you look down the fish's mouth is the hook pierced through the throat with the point of the hook pointing back towards the mouth. This can seem like an impossible situation but there is actually a pretty simple method to removing this hook without causing excessive damage to the fish. You can take the eye of the hook and bend it towards the gill away from the hook shank. This causes the hook to naturally rotate and turns the bend of the hook towards you and the point of the hook so that it is pointing towards the fish's throat. Sometimes you need to reach up through the gills from the gill plate to grab the hook eye to fully rotate it. Once the bend of the hook is pointing towards the mouth you can reach in and grab the bend with your pliers or hands and the hook will pull right out. When employing this method be very careful to avoid damaging the gills. They do have a tendency to grab your finger, making it difficult to remove your finger from the fish's mouth. If you cut the gill, even slightly, it will result in a lot of blood loss from the fish. If a hook is swallowed you should never just yank the hook out. You will almost always cause enough damage to kill the fish. The fish may not die right away but almost certainly will after a short period of time. If you can't perform the method above to remove the hook from a gut hooked fish it is just better to cut the line and let the fish pass the hook. It won't be pretty but it is better than death. Visit this page for some helpful illustrations on the method of unhooking gut hooked fish described above.

Avoid removal of the fish's slime layer. The layer of slime that covers a fish is its first line of defense against diseases, parasites, and bacteria. The absence of that protective layer puts the fish at greater risk of disease and infection, and compromises the fish's ability to recover from wounds. The actions you can take to prevent removing the slime layer start before the fish is even in the boat, particularly if you use a net. Typically your net will get wet when you dip your net in the water to net the fish, but since your net is often the first thing the fish comes into contact with, ensuring it is wet will help prevent slime removal. If you are measuring your fish, dip your measuring board into the water prior to putting the fish on the board. Again the wet board minimizes the amount of slime removed from the fish. The biggest offender and often the most difficult to prevent, especially if you have a particularly uncooperative fish, is letting the fish lay on the floor of your boat or the ground. Try to maintain a hold on the fish by the jaw and preferably in the water as much as possible. Which leads us to our next item…

Limit the fish's time out of water. A good rule of thumb is to keep the fish out of the water no longer than you can hold your breath. That at times can be a very tall order, particularly if you are fishing competitively and need to get a length or weight measurement on the fish. I like using fish grippers to minimize the time I hold fish out of water because, as opposed to a stringer, you don't need to poke any holes in the fish or run a line through the gills. With grippers you can tie off to the boat, attach the grippers to the fish's lips, and set them in the water while you get all of your stuff together e.g. - camera, measuring board, scale, tournament identifier, etc.). Once you have everything ready you can pull the fish out of the water and remove the grippers to take your measurements. If I am getting a weight and a length I usually put the fish back in the water for a few seconds between the two.

DO NOT JACK THE JAW! I put this one in all caps for a reason; because either people don't realize this can break the fishes jaw, or they think it looks cool in pictures. Jacking the fish's jaw, especially on a big fish, is a sure way to break their jaw. They may seem healthy when you release them but they likely wont be able to feed over the coming days and will die. Jacking a fishes jaw happens when you grab the fish by the lower lip and then hold the fish up horizontally with no support under the belly. This puts all the weight of the fish directly on the lower jaw of the fish. When you hold a fish horizontally, place your hand under the belly of the fish to support the weight.

Release the fish when it is ready. This one sounds sort of silly. The fish is likely ready to be released long before it reaches the boat right? What I mean by this is after handling the fish for several minutes don't just throw it back in the water. Especially if it is a big fish or if it was a long fight. Often the fish is tired out and just throwing it back in the water can cause it to go belly up or struggle, making it vulnerable to predators. There are a few methods I employ to make sure a fish is ready to be released. First, I just lay the fish in the water naturally holding it by the lower jaw. More often than not that is all the motivation the fish needs to swim away; however, sometimes the fish will try to go belly up or just won't have the energy to leave. When this happens what I typically do is move the fish's head side to side gently while holding the bottom jaw. This gets a little bit of oxygen flowing and often can snap the fish into gear. On the most tired fish even this isn't enough sometimes. If this is the case I perform the same action but instead of grabbing the fish by the jaw I grab it by the tail and gently shake the tail from side to side. If all of these tactics fail then the last thing I do is again grab the fish by the lower jaw and move the fish forwards and backwards through the water forcing water over the gills. Sometimes you will need to perform all of these actions over the course of 5 or even 10 minutes to revive the fish.

Ensuring a healthy catch and release of a fish can often take some extra time and attention to detail but in the end it will result in a healthier community with bigger bass for years to come. Links to some of the products I really like for employing CPR are listed below.

Fish Grippers
Hawg Trough Measuring Board
Leverage Landing Net

Some photos courtesy of Black-Schmidt Photography